
Jarrett Parr is a Financial Systems Implementer for SuiteDynamics, a NetSuite solutions provider. He enjoys analyzing and improving processes for both our company and clients. He also loves solving accounting and financial problems for growing businesses. Jarrett lives in Madison, WI, with his wife, Abbie, and their golden retriever, Clark.
How to Document NetSuite Custom Objects When Merging Environments
Combining ERPs can get tricky. Here's how to tackle redundancies.
Suppose your company acquires another business that operates on its own enterprise resource planning (ERP) system. Obviously, no organization needs—or wants—two completely different ERPs.
So, you must consolidate. During that consolidation, you need to document all NetSuite custom objects in your instance to eliminate redundancies and identify any items that will transfer to your new system. It’s a practical necessity.
In this case, the term “custom object” can refer to any of the following.
- Search
- Custom Record Field
- Subsidiary
- Mass Update
- Scripts
- Entity Field
- List
- User Role
- Entry Form
- Workflow
- Bundle
- Body Field
- Column Field
- Standard Field
- Records
- Other Field
- Item Field
- Location
- Transaction Form
- CRM Field
- Department
- Class
You can use the Netwrix Flashlight by Strongpoint for NetSuite for documentation. It’s a third-party NetSuite bundle that uses a “spider” to crawl all objects in your system’s environment. A spider is an automated program that examines and indexes your entire instance, identifying NetSuite custom objects as it goes. A spider may take several days to complete its task.
How to Document NetSuite Custom Objects
First, download the Flashlight Bundle. Then, click the SuiteApps menu and type “Flashlight” in the search bar.
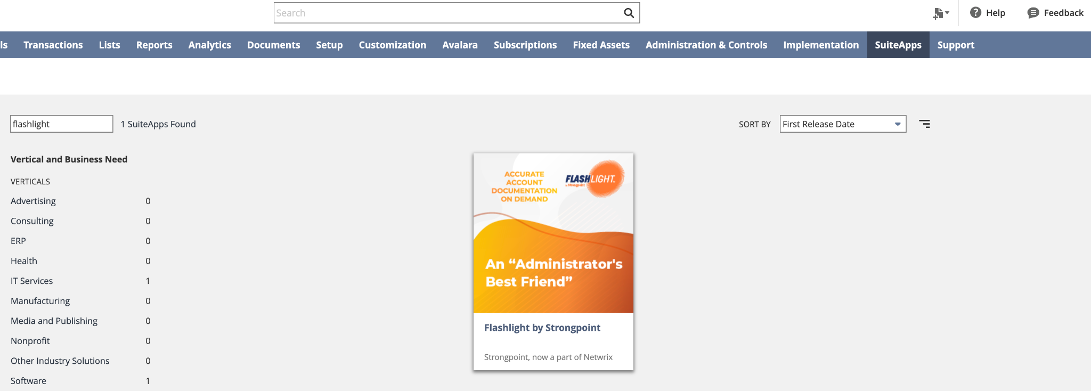
Click the Flashlight icon and install the bundle.
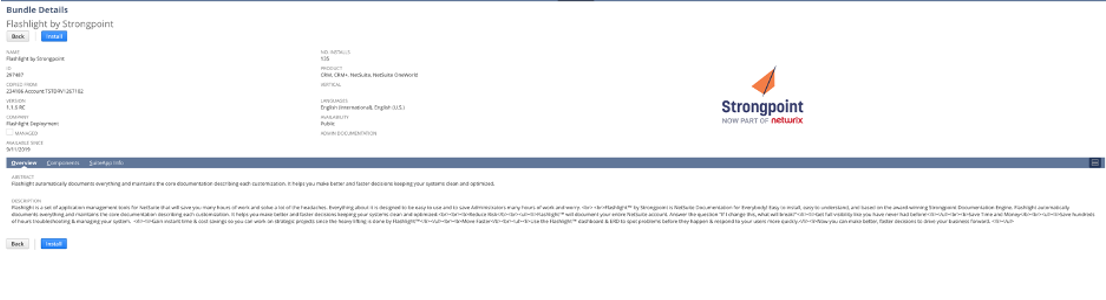
Wait for the Flashlight bundle to finish installing. Then, you will see a new Flashlight menu in your NetSuite header.
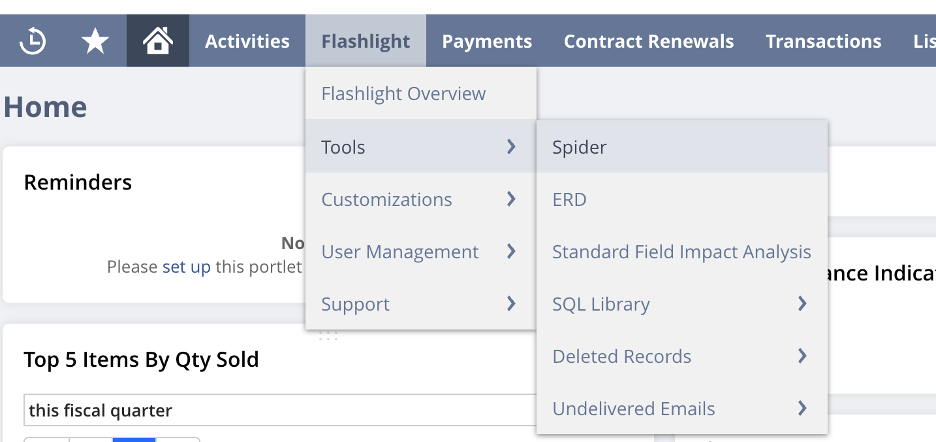
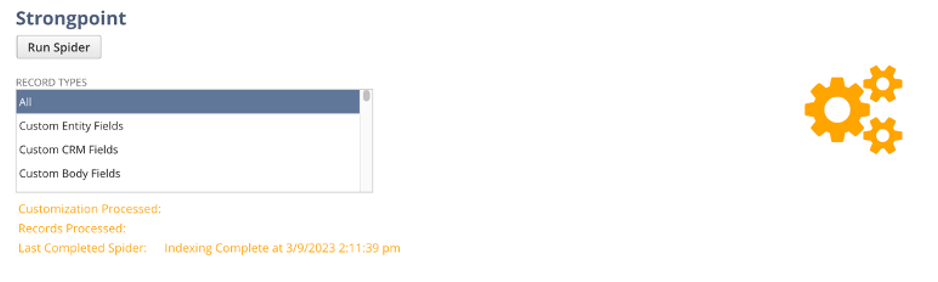
Navigate to Flashlight>Tools>Spider. Then, run the spider.
*Warning* After starting the spider, you can’t navigate away from the page until the indexing process ends. The process could last 15 minutes to over an hour.
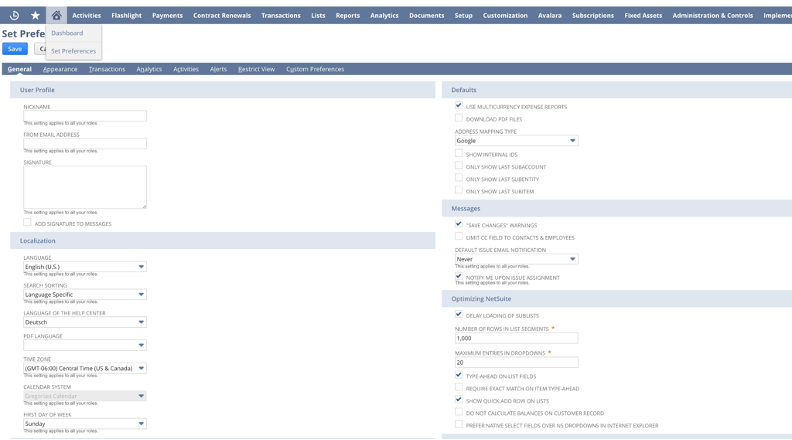
You may also see an error message, “The Number of Rows in List Segments needs to be set to 1,000.” Fix the issue by navigating to Home>Set Preferences. Then, click on the Number of Rows in List Segments field under the Optimizing NetSuite section. Change the number to 1,000. Click Save.
Navigate back to the spider and run it. When the indexing is done, your screen will display an “Indexing complete at DD/MM/YYYY” message. You can now leave the page, even though the spider has not crawled all items yet. It has only indexed them.
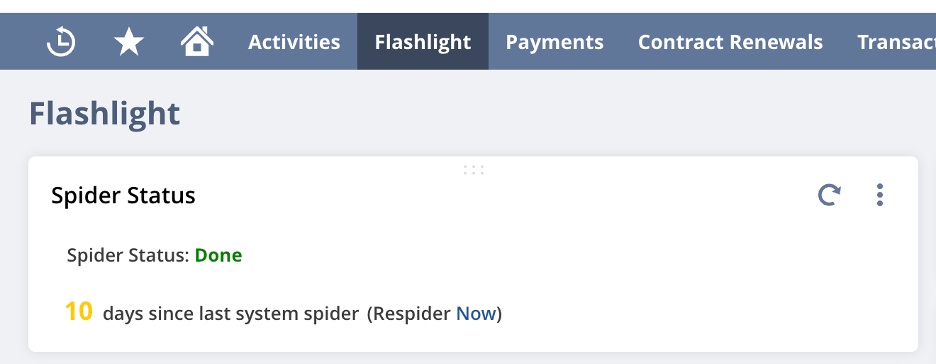
Check the spider’s status on the Flashlight Overview page under the Spider Status portlet. The program is finished when the Spider Status says “Done.” The portlet will also show the completion date for the last spider crawl.
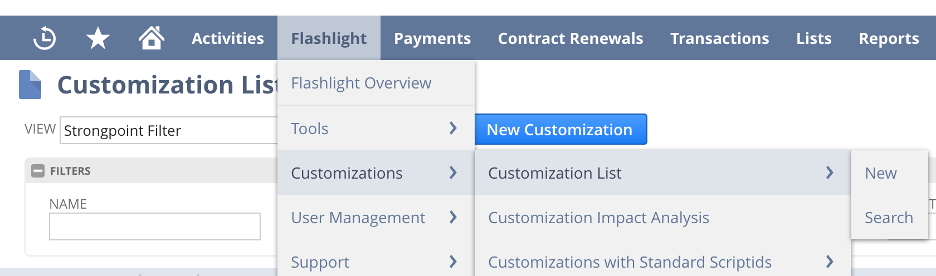
Next, navigate to Flashlight>Customization>Customization List.
Ensure the filter is set to Strongpoint Filter. The setting provides a list of every NetSuite custom object in the instance.
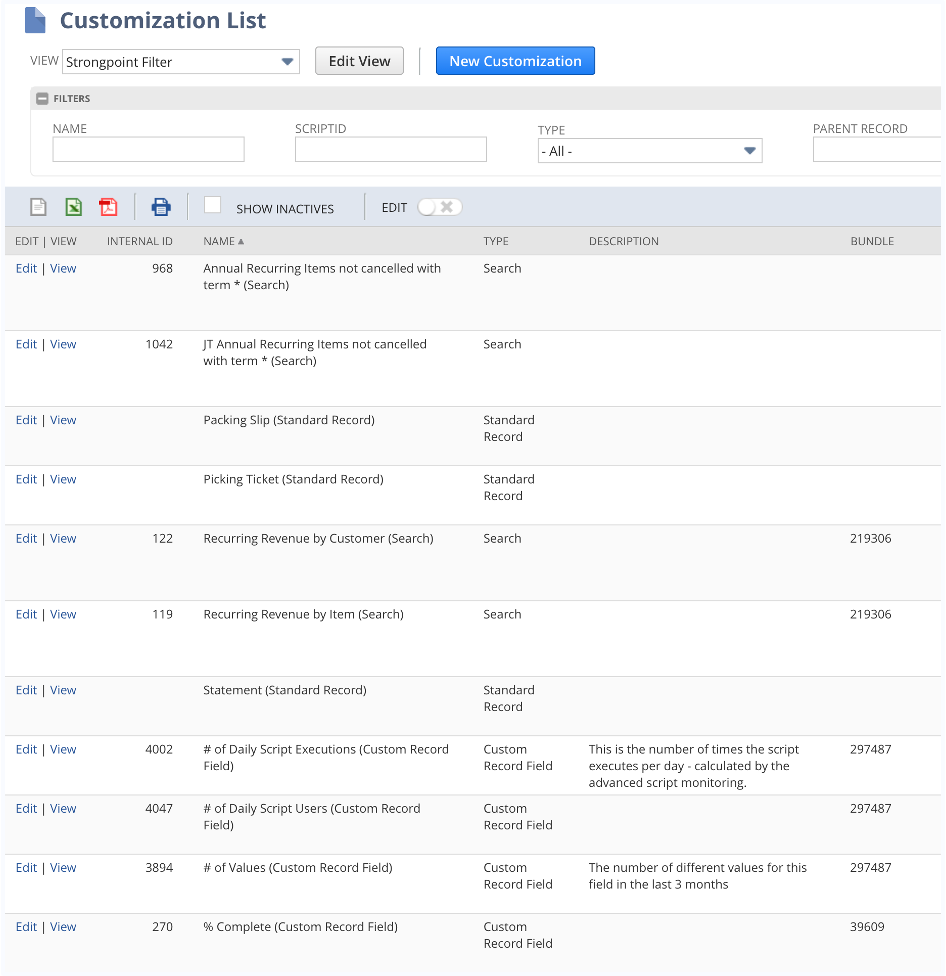
Then, export the list to Excel. You’ll receive a report identifying whether an object is in use, its purpose, and whether it should be transferred to your new NetSuite environment.
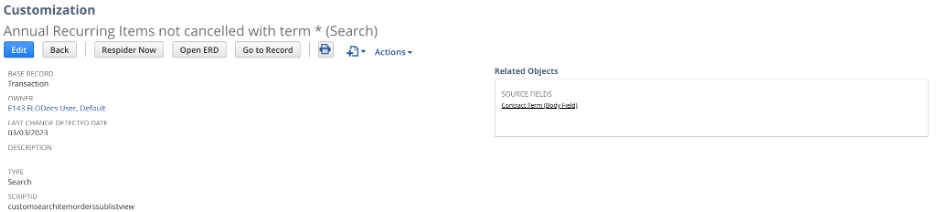
You can also click View to see the object’s Flashlight record. This duplicate record contains helpful information about the real record, such as the record type and its related NetSuite custom objects. It also includes a direct link to the actual record.
Need More NetSuite Tips?
A NetSuite ERP can revolutionize your business—but only if you know how to use it. SuiteDynamics Managed Services plans include one-on-one and group training sessions that can help your team get the most out of your NetSuite investment. We’ll teach you more about NetSuite custom objects, custom segments, dashboards and reports, and any other tools you need to succeed. Contact us to start maximizing your system’s potential.


Get step-by-step instructions for accepting customer payments, making deposits, matching bank data, and completing a bank reconciliation in NetSuite.

Many businesses need complex accounting systems to maintain cash flows. Discover how switching from QuickBooks to NetSuite can create the financial stability you need.

Tired of chaotic physical inventory counts? Explore ten ways NetSuite's Warehouse Management System can optimize your operations and ensure accurate inventory management.

As shipping grows more critical, so does mobile scanning. Discover why this tool will soon become essential for most manufacturing and retail businesses.

Is your NetSuite ERP stuck in the past as your business evolves? Our solution design services keep your system aligned with your changing needs. Discover all you need to know in this guide.

NetSuite ERP customization is complex, but thorough technical documentation can simplify future changes. Learn how it tracks system development, empowers your team, and unlocks your NetSuite investment's full potential.

The NetSuite dashboard and report will help you make sense of data quickly and easily! Learn about these powerful tools and how to use them.

SuiteDynamics has earned the Winter 2025 Alliance Partner Spotlight Award from Oracle NetSuite for exceptional healthcare software solutions. Learn how we can help you!

Understanding costing methods is essential for any business. This guide provides a quick overview of the different varieties and how they can be used with NetSuite accounting software.

An Oracle NetSuite ERP transforms how businesses operate by unifying their computer systems on a single platform. Learn more about this essential software and how it can serve you!
