There are several tricks for getting desired results in NetSuite.
Here's a favorite.
If you’re going to make an informed decision on financial reporting, you need accurate and timely information. Period. You can’t run a good business on bad data.
You’re in luck! NetSuite offers several
reporting features
to help businesses track financial performance. This includes the creation of custom timeframes on comparative income statements, which allows you to compare data across different periods.
But take some advice from a
NetSuite implementer: You should use my
NetSuite customization hack to get desired results without much effort.
Quick Tip for Customizing NetSuite
The system’s native comparative income statement lets you choose a custom timeframe to compare against the previous year. However, you have to do it correctly. You may end up with a vague and useless report when you compare, for example, the first quarter of this year to the entire previous year.
This hack will help you match a specific timeframe from your current year to an exact timeframe of the previous year (or any year on record). This way, you’ll get an accurate and detailed report you can actually use for direct comparison.
Here’s how you do it.
NetSuite Customization Process: Comparative Income Statements
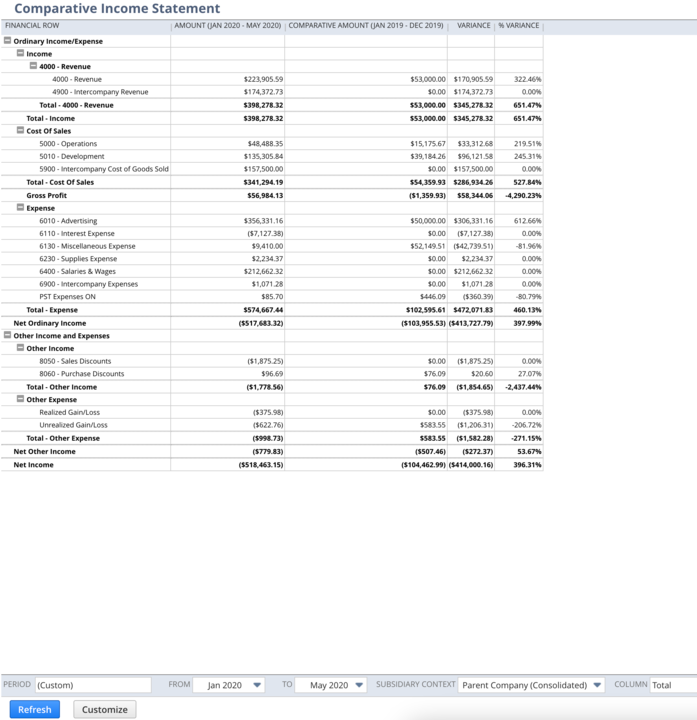
Below, I’ve selected January through May 2020 as the date range.
NetSuite fills the comparative column with data from the previous year, January through December. Without customization, you can’t change the prior year’s month range.
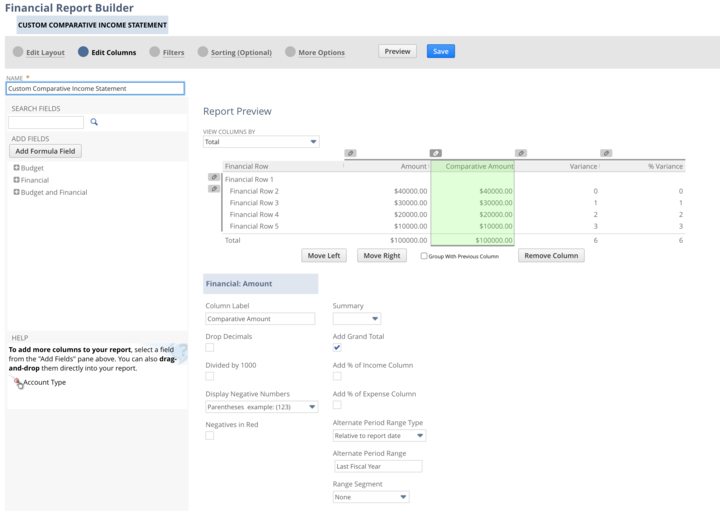
You must customize the Comparative Amount column on the back end of the report. So, adjust comparative date ranges by pressing
Customize. Then, navigate to
Edit Columns > Comparative Amount.
Change the
Alternate Period Range Type to
Relative to Today’s Date and the
Alternate Period Range to
Custom. This custom time frame allows you to set custom dates in the Comparative Amount column.
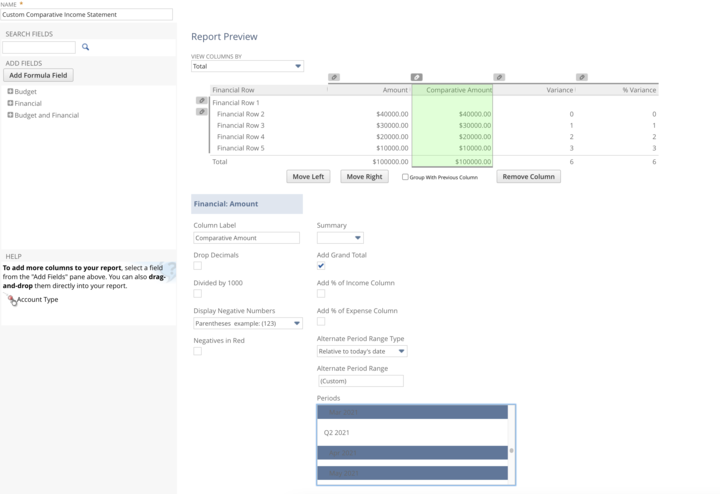
Next, select the months you want on your report, omitting quarter distinctions.
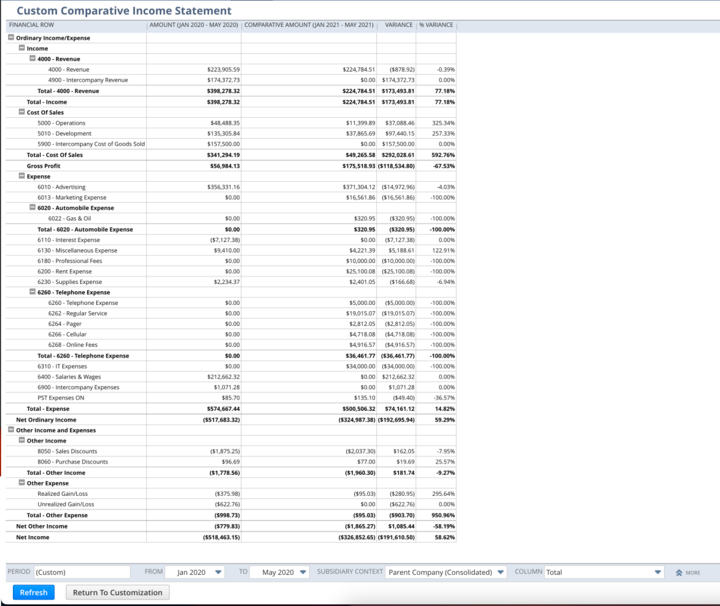
Press
Preview, or if you wish to keep this as a customized report, name it and press
Save. Adjust your Amount column timeframe to match what you’ve selected on the report’s back end.
To recap, select your Amount custom timeframe from the report. Then, choose your Comparative Amount timeframe from the back-end customization. And voila! You can compare a specific timeframe from two different years.
NetSuite Customization Pro Tip: You can also perform this customization on your comparative balance sheet by following the same steps.
Have any questions about comparative income statements, custom timeframes, or any NetSuite features? Not a big deal. Partner with SuiteDynamics and get all the answers you need.
New Button